【Swift4】StoryboardでUITableViewのカスタムセルを実装する方法【iOS11】
StoryboardでUITableViewのカスタムセルを実装する方法をご紹介します。
UITableViewの実装方法はこちらです
【Swift4】StoryboardでUITableViewを3分で実装する方法【iOS11】
1.UITableViewを実装
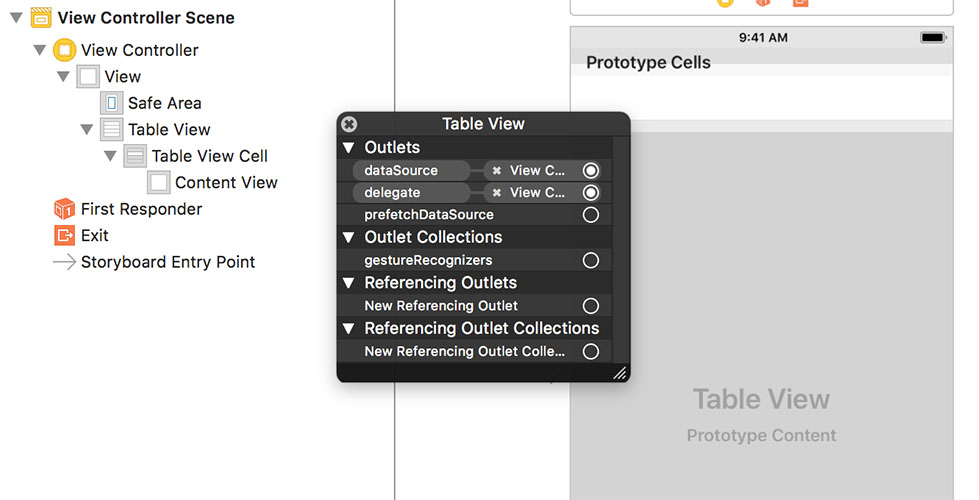
まずはTableViewを実装しましょう。
UITableViewを実装したいStoryboardにTableView、TableViewCellを配置し、TableViewのOutletsのdataSourceとdelegateを、TableViewを実装させるViewControllerにセットします。
class ViewController: UIViewController, UITableViewDelegate, UITableViewDataSource {
 // セクションの数
    func numberOfSections(in tableView: UITableView) -> Int {
        return 1
    }

    // セルの数
    func tableView(_ tableView: UITableView, numberOfRowsInSection section: Int) -> Int {
        return 10
    }

    // セルを返す
    func tableView(_ tableView: UITableView, cellForRowAt indexPath: IndexPath) -> UITableViewCell {
        return cell
    }

    // セルをタップした時に呼ばれる
    func tableView(_ table: UITableView,didSelectRowAt indexPath: IndexPath) {
        print("セルをタップしました")
}UITableViewの主なコードはこちらです
カスタムセル用のクラスを作成
メニューバーからFile -> New -> File...の順に選択し新しいファイルを作成します。
出てきた画面から「Cocoa Touch Class」を選択しNEXTボタンを押します。
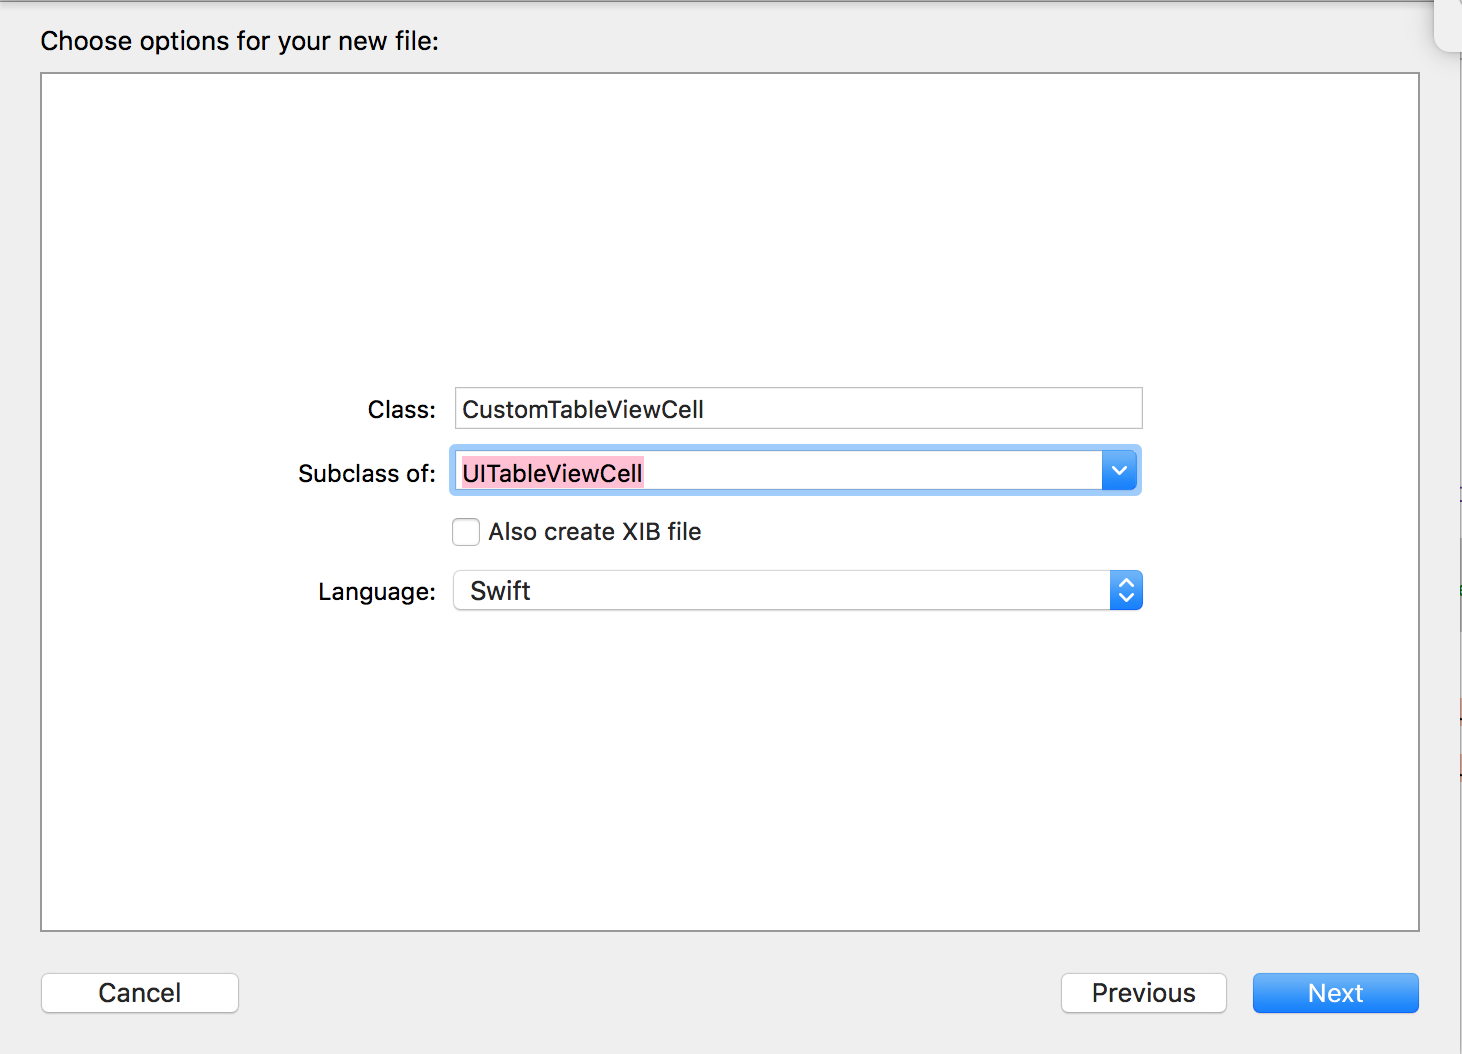
クラス名を指定する画面で「Subclass of:」の右側を「UITableViewCell」に変更し、
「Class:」の右側を任意の名前を入力し、NEXTボタンを押します。
今回は「CustomTableViewCell」と言う名前にしました。

CustomTableViewCellができたらTableViewCellのCustom ClassのClassを「CustomTableViewCell」に設定します。

次にTableViewCellのIdentifierを設定します。
Identifierを設定することでCellの再利用が可能になりメモリに優しい設計となるので忘れずに行なってください。
今回はIndetifierを「CustomCell」という名前に設定しました。
Label
TableViewCellをカスタムしていきます。今回はTableViewCellに数字を表示するnumberLabelと、タイトルを表示するtitleLabelの2つのLabelを用意したいと思います。
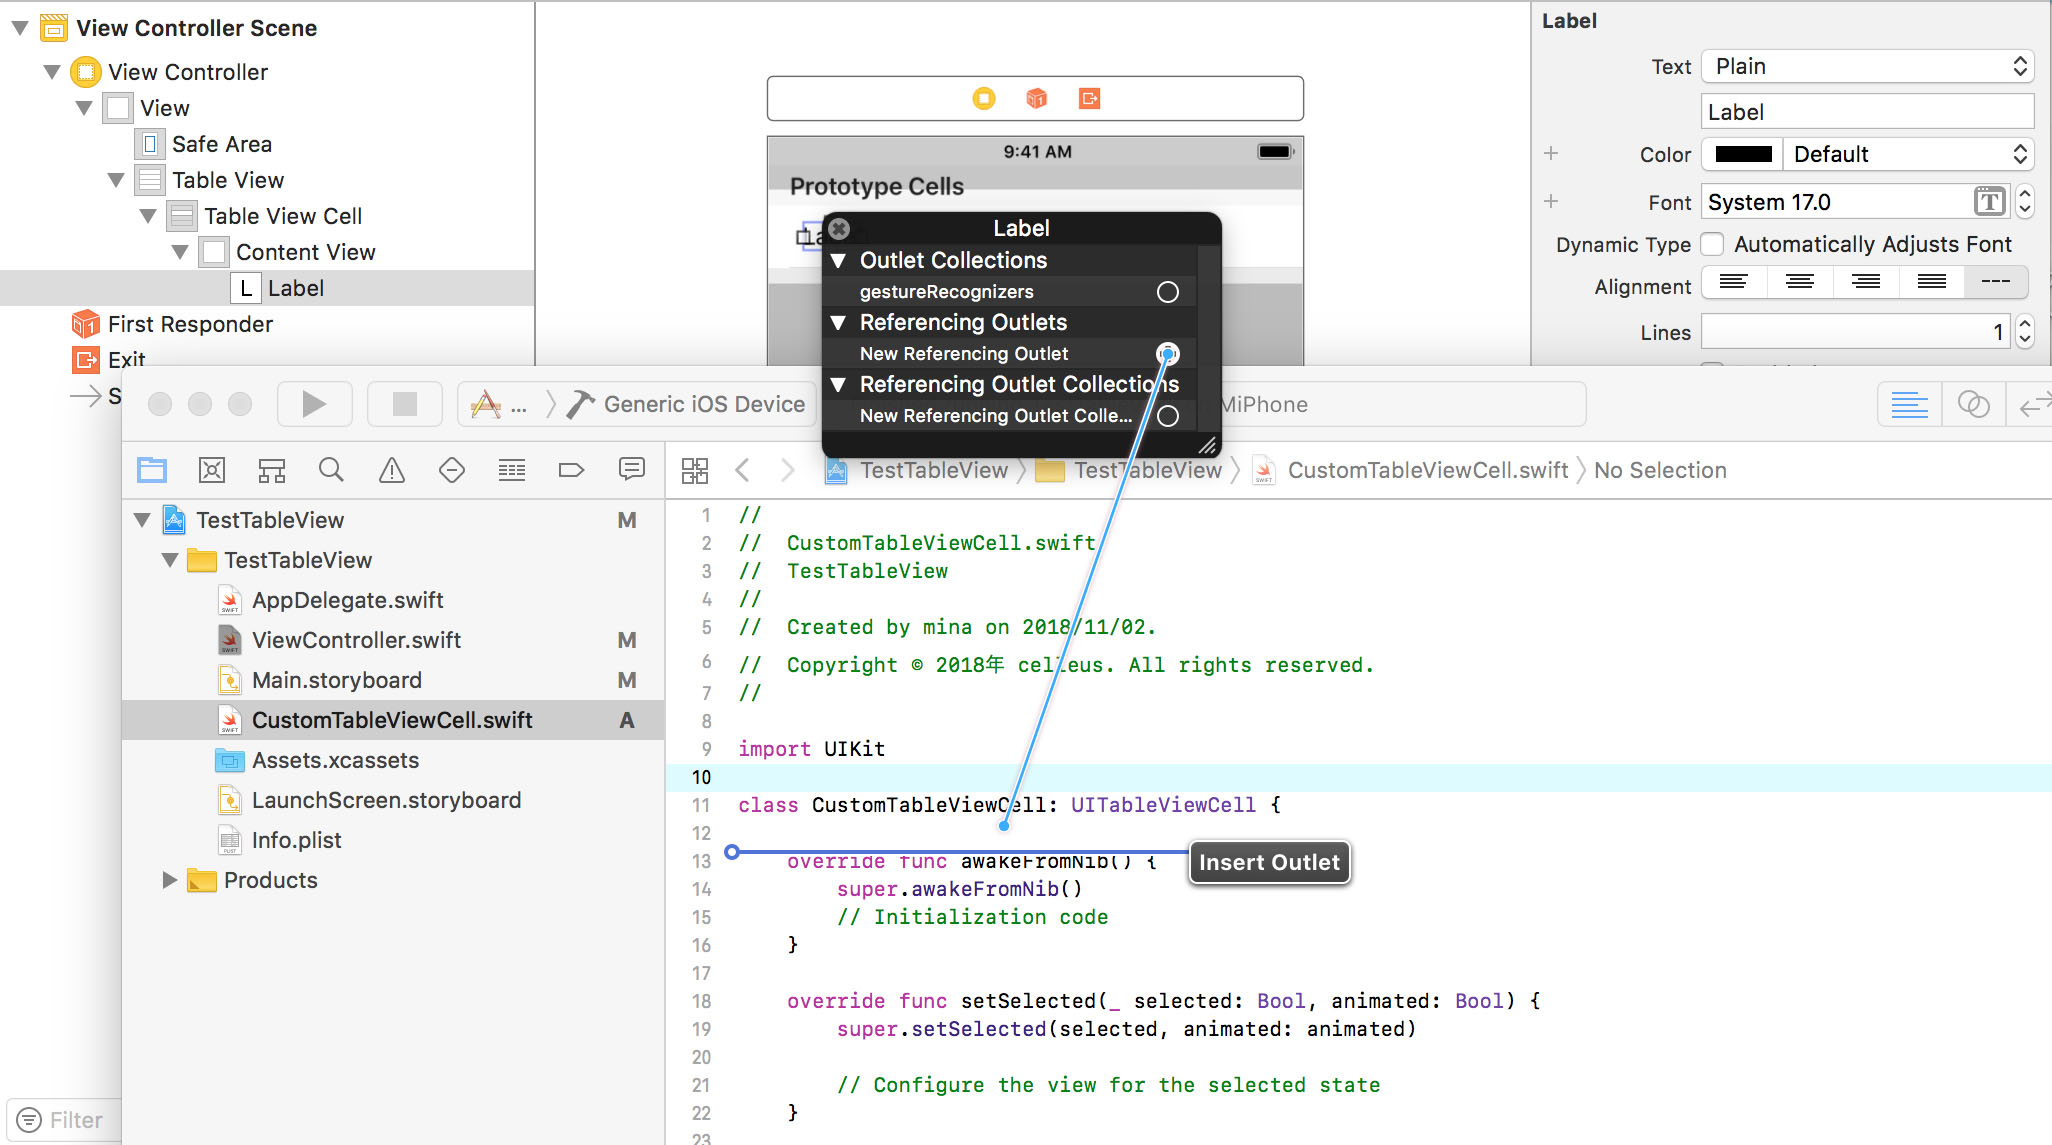
StoryboardのLabelをCustomTableViewCellに紐づけ、コードを書いていきます。
    // セルを返す
    func tableView(_ tableView: UITableView, cellForRowAt indexPath: IndexPath) -> UITableViewCell {

        // セルにテキストを出力する。
        let cell : CustomTableViewCell = tableView.dequeueReusableCell(withIdentifier: "CustomCell", for: indexPath) as! CustomTableViewCell

        // セルに表示する値(ラベルの文字など)を設定する
        cell.numberLabel!.text = String(indexPath.row + 1)
        cell.titleLabel!.text = fruits[indexPath.row] as? String

        return cell
    }
以上で実装は完了となります。
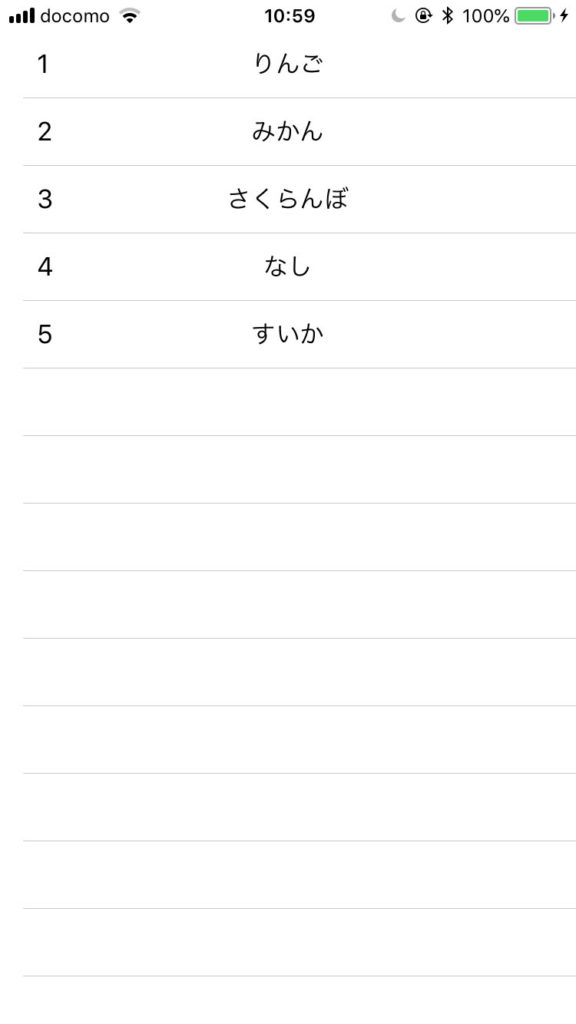
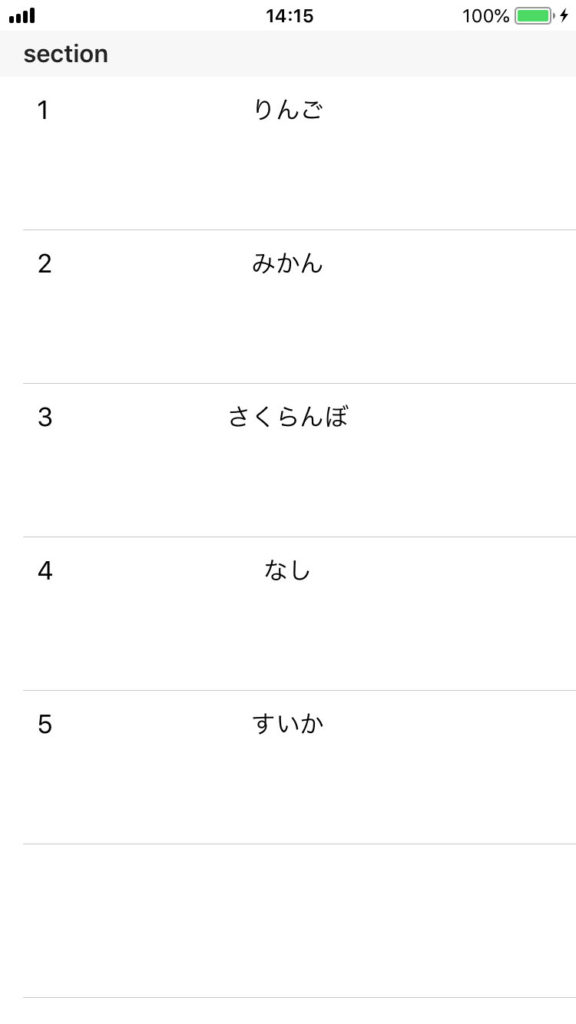
実際にビルドするとこんな感じのTableViewが表示されます。
セクションや高さなども追加したコード部分のまとめは以下のようになります。
ViewController.swift
import UIKit

class ViewController: UIViewController, UITableViewDelegate, UITableViewDataSource {

    // セルのテキストArray
    var fruits: NSMutableArray = ["りんご", "みかん", "さくらんぼ", "なし", "すいか"]

    override func viewDidLoad() {
        super.viewDidLoad()
        // Do any additional setup after loading the view, typically from a nib.
    }

    override func didReceiveMemoryWarning() {
        super.didReceiveMemoryWarning()
        // Dispose of any resources that can be recreated.
    }

    // セクションの数
    func numberOfSections(in tableView: UITableView) -> Int {
        return 1
    }

    // セクションの高さ
    func tableView(_ table:UITableView,heightForHeaderInSection  section:Int) -> CGFloat {
        return  30
    }

    // セルの数
    func tableView(_ tableView: UITableView, numberOfRowsInSection section: Int) -> Int {
        return fruits.count
    }

    // セルの高さ
    func tableView(_ table: UITableView,heightForRowAt indexPath: IndexPath) -> CGFloat {
        return  100
    }

    // セクション
    func tableView(_ tableView: UITableView, titleForHeaderInSection section: Int) -> String?  {
        return "section"
    }

    // セルを返す
    func tableView(_ tableView: UITableView, cellForRowAt indexPath: IndexPath) -> UITableViewCell {

        // セルにテキストを出力する。
        let cell : CustomTableViewCell = tableView.dequeueReusableCell(withIdentifier: "CustomCell", for: indexPath) as! CustomTableViewCell

        // セルに表示する値(ラベルの文字など)を設定する
        cell.numberLabel!.text = String(indexPath.row + 1)
        cell.titleLabel!.text = fruits[indexPath.row] as? String

        return cell
    }

    // セルをタップした時に呼ばれる処理
    func tableView(_ table: UITableView,didSelectRowAt indexPath: IndexPath) {
        print("セルをタップしました")
    }

}
CustomTableViewCell.swift
import UIKit

class CustomTableViewCell: UITableViewCell {

    @IBOutlet weak var numberLabel: UILabel!
    @IBOutlet weak var titleLabel: UILabel!

    override func awakeFromNib() {
        super.awakeFromNib()
        // Initialization code
    }

    override func setSelected(_ selected: Bool, animated: Bool) {
        super.setSelected(selected, animated: animated)

        // Configure the view for the selected state
    }

}